Ontosight® – Biweekly NewsletterJune 17th – June 30th, 2024 –Read More
Ontosight® – Biweekly NewsletterJune 17th – June 30th, 2024 –Read More

May 24

Apr 24

Innoplexus wins Horizon Interactive Gold Award for Curia App
Read MoreBlockchain technology has a concept of transactions to store the data and make it immutable. The blockchain protocol EOS also transacts the data on blockchain but there are two types of transactions in EOS, Inline and transaction with delay. Inline transactions are those which get executed when you push them into blockchain and producers verify them whereas transactions with delay can be scheduled to get executed after a particular delay after which producers verify it and add them in the block.
In this article, we are gonna learn how to create a transaction with delay on EOS blockchain.
We will write a smart contract which contains a table to store the account holder name and summation of given numbers, our focus here is not to write complex actions so I choose simple addition action so that we can focus more on the transaction.
I am assuming that you know about the concept of public and private keys.
In this contract, we have two actions one is transfertxn that calls the main addition function after a given delay. Our addition action looks like:
Now, we need to create a table structure to store the data. Table structure looks like:
Above table stores account and the addition of two numbers with primary key `account`. Now our transfertxn action looks like:
So let’s understand the transfertxn action.
Now, we need to make a txn object of transaction which is defined in eosiolib/transaction.hpp. In this object, we add the action with appropriate parameters and set the delay as you can see in the above code. Now, let’s understand the action parameter one by one.
Finally, our tbsample.cpp file looks like:
#include <eosiolib/eosio.hpp>
#include <eosiolib/print.hpp>
#include <eosiolib/transaction.hpp>
#include <eosiolib/print.hpp>
#include <string>
using namespace std;
using namespace eosio;
class benjamin: public eosio::contract
{
public:
using contract::contract;
/// @abi table sumtable i64
struct sumtable
{
account_name account;
uint64_t additionsum;
uint64_t primary_key() const { return account;
}
EOSLIB_SERIALIZE(sumtable, (account)(additionsum))
};
typedef multi_index<N(sumtable), sumtable> _table;
/// @abi action
void addition(account_name user, std::string memo, uint64_t delay, uint64_t a, uint64_t b)
{
_table ttabs(_self, _self);
uint64_t sum = a + b;
auto iter = ttabs.find(user);
if (iter == ttabs.end())
{
print(“now the sum is inserted _________\t”); ttabs.emplace(_self, [&](auto &sumtable) {
sumtable.account = user;
sumtable.additionsum = sum;
});
}
else
{
ttabs.erase(iter);
print(“\n”);
}
}
/// @abi action
void transfertxn(account_name from, uint64_t a, uint64_t b, string memo, uint64_t delay)
{
eosio::transaction txn{};
txn.actions.emplace_back(
eosio::permission_level(from, N(active)),
N(testaccount),
N(addition),
std::make_tuple(from, memo, delay, a, b));
txn.delay_sec = delay;
txn.send(eosio::string_to_name(memo.c_str()), from);
print(“the transaction has been executed _________________\n”);
}
};
EOSIO_ABI(benjamin, (addition)(transfertxn))
You can declare your actions in a separate .hpp file (header file) too. Now, let’s deploy and test it.
First, run the nodeos, below is the command to start nodeos
Now, compile the wast and abi file for this contract.
Set the contract with account_name testaccount(my account name), before setting our contract our wallet must be unlocked. So let’s set the contract.
After setting the contract now it’s time to push our action to the blockchain nodes. For testing, I am passing a delay of 20 seconds.
After execution of this command, you get a message similar to this.
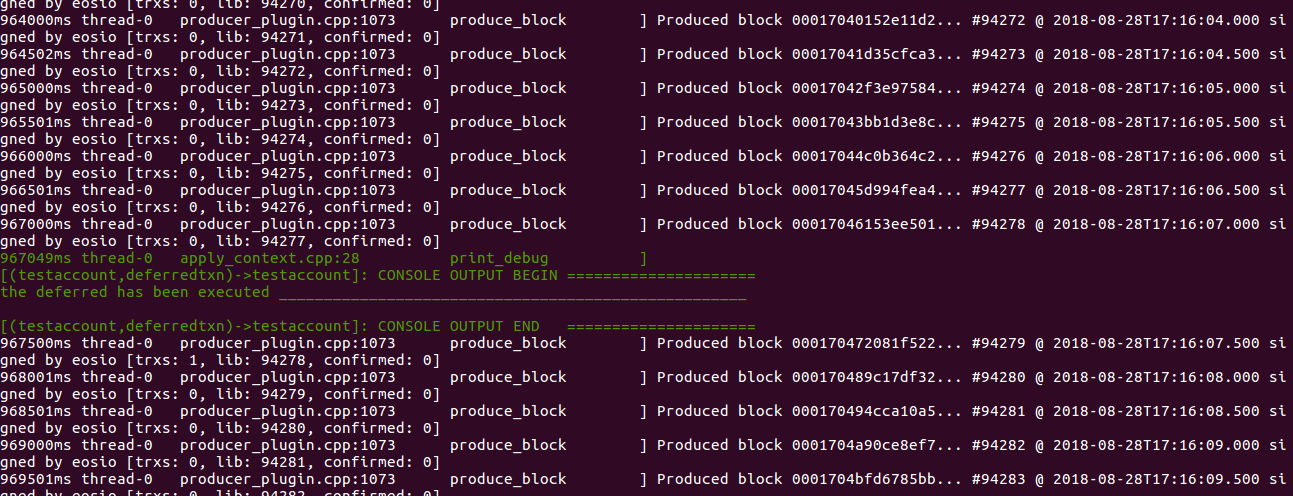
Ignore the warnings if any, Now let’s come back to our contract, So we have pushed our action into the local blockchain, If you go to your nodeos terminal you can see your transaction running like this.
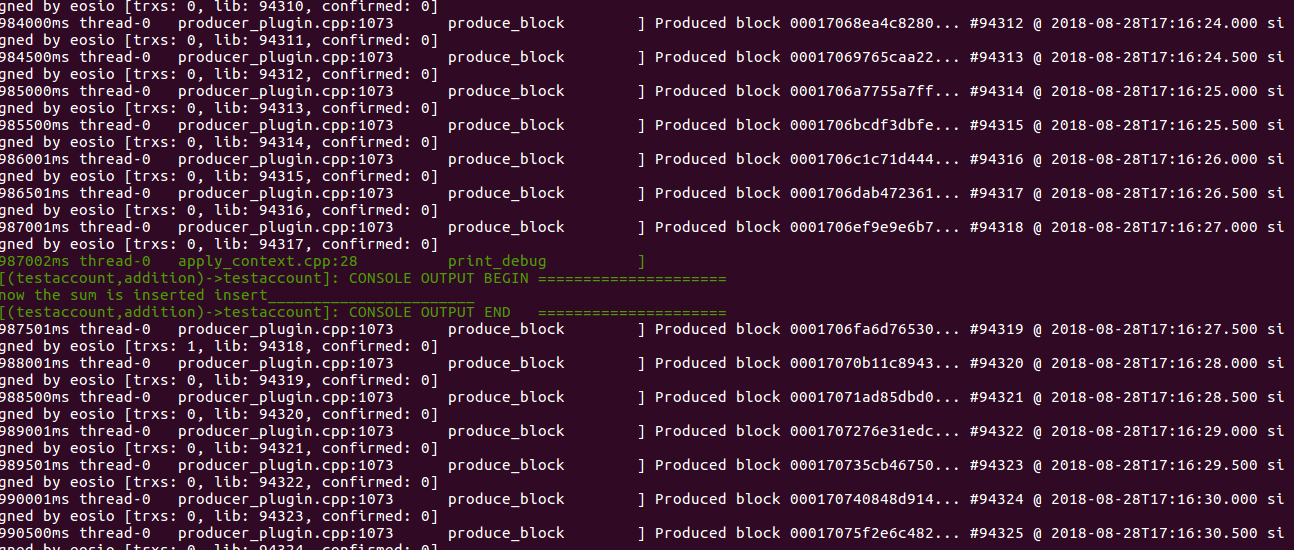
As we give the delay of 20 seconds in the transfertxn action, So after 20 seconds we added the two numbers and put them into the table. So after 20 seconds, your addition action will trigger and our nodeos window looks like this if works as intended.
To get the table data,
So this is how transactions work. We also have a feature to cancel a transaction with delay
If you run into any issues getting the application working, feel free to write us on info@innoplexus.com.
Resources and references
1. EOS developers
2. EOS Stack Exchange

The cost of developing a new drug roughly doubles every nine years (inflation-adjusted) aka Eroom’s law. As the volume of data…
There was a time when science depended on manual efforts by scientists and researchers. Then, came an avalanche of data…
Collaboration with key opinion leaders and influencers becomes crucial at various stages of the drug development chain. When a pharmaceutical…
Data are not the new gold – but the ability to put them together in a relevant and analyzable way…
Artificial intelligence, or AI, is gaining more attention in the pharma space these days. At one time evoking images from…
Artificial intelligence (AI) is transforming the pharmaceutical industry with extraordinary innovations that are automating processes at every stage of drug…
There is a lot of buzz these days about how artificial intelligence (AI) is going to disrupt the pharmaceutical industry….
Drug discovery plays a key role in the pharma and biotech industries. Discovering unmet needs, pinpointing the target, identifying the…
The pharmaceutical industry spends billions on R&D each year. Clinical trials require tremendous amounts of effort, from identifying sites and…
Training algorithms to identify and extract Life Sciences-specific data The English dictionary is full of words and definitions that can be…
The early 1970s introduced the world to the idea of computer vision, a promising technology automating tasks that would otherwise…
Summary: AI could potentially speed drug discovery and save time in rejecting treatments that are unlikely to yield worthwhile resultsAI has…